FRENCH COUNTRY HUTCH DIY


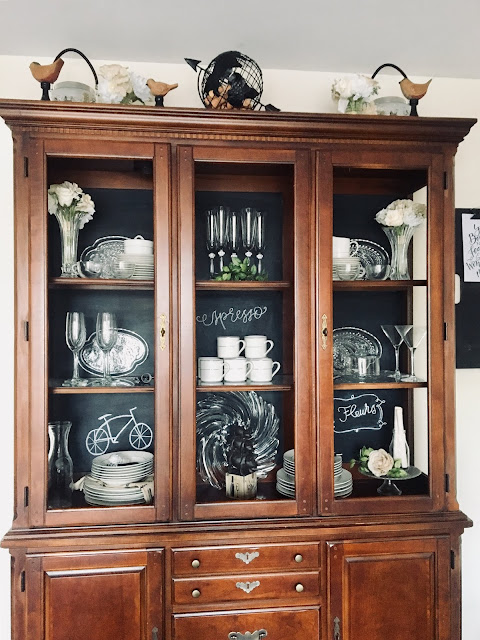
 This traditional style hutch was here when we bought our house. It originally had a mirrored back.

 At first, this didn’t bother me too much until Pinterest happened. It seemed like everyone was chalk painting their hutches. I didn’t want to change the whole look, but I did want to get rid of the dated mirrored back. So what do you think I did? Chalkboard paint baby!

 This small investment in an $11.00 paint was worth a shot. It was scary at the first coat of paint because it looked like it wasn’t going to work. I decided to press on. Guess what? It worked! I will take at least 3 coats of paint.

 The next step was to take the glass out of the doors so I could view the decorations better.

 Here are a few close up photos of my decor.


I hope this inspires you!

Comments

Popular posts from this blog

Farmhouse Flower Market Style

Today, I want to show you how to decorate from scratch to achieve a cozy inviting farmhouse style. When you are ready to take on that area of your home, there are 3 key points to consider. 1. Pick a theme 2. Choose a color 3. Use unexpected items PICK A THEME Let your imagination go wild! Think of a hobby you like or get inspiration from nature. How about a farmer's market stand, store front or location you love. Gather decor items that pertain to it. CHOOSE A COLOR Start out with 1 color and find  items  or paint  something.   For example,  an empty picture frame or Mason Jar. Use fabric in a garland or tied to a jar. Get creative with flowers and handmade crafts. USE UNEXPECTED ITEMS An unexpected item is something normally used outside or a salvaged piece. Old ladders, shutters, doors, etc. Here is how I achieved this Farmhouse Flower Market Theme I took an old ladder that I found on the side of the road  and painte...

Styling Tiered Trays

    Styling a tiered tray can be a daunting task. How do you even  start? I am going to show you how to make it happen.  First: Theme pick your holiday, season or subject Second: Gather shop your home, go to the Target dollar spot, thrift shops etc. Third: Repetition  I like to buy in three’s and two’s  keeping the same piece on each level brings continuity  Fourth: Scale Larger items at the bottom, smaller at the top This is pleasing to the eyes! Fifth: Be Creative  There are no limits to what you can achieve! Use your imagination and it will naturally flow! I hope this helps you have fun decorating your trays!

Farmhouse Tiered Tray Decorating

Styling a tiered tray is a fun way to bring some small decor items to life. I love to find different things around the house to scatter on the different levels. Most of the trays I see on Pinterest have a small, medium and large order. Since I did not have this style, I will just have to improvise! I had a 3 tier dessert tray that I barely used and thought "this could work!" Instead of using dinner plates, I grabbed my 3 glass pie plates. The original tray color was gold, but I thought white would be a better choice. So off to the shed I went.  So at the moment I have been into country farm decor and all things red. This will be my inspiration. Now let's get ready to decorate.Yippee! I used red gingham fabric squares to line the 2 pie plates. For the middle I wanted books with my devotionals handy. They happen to be in red and pinks. Now to find some cute decor items to fill in the empty spaces. I always love to add Mason Jars in my decorating and this was a good star...